Posted on Leave a comment

How Selenium Users could easily adapt to Testup in 20 Minutes

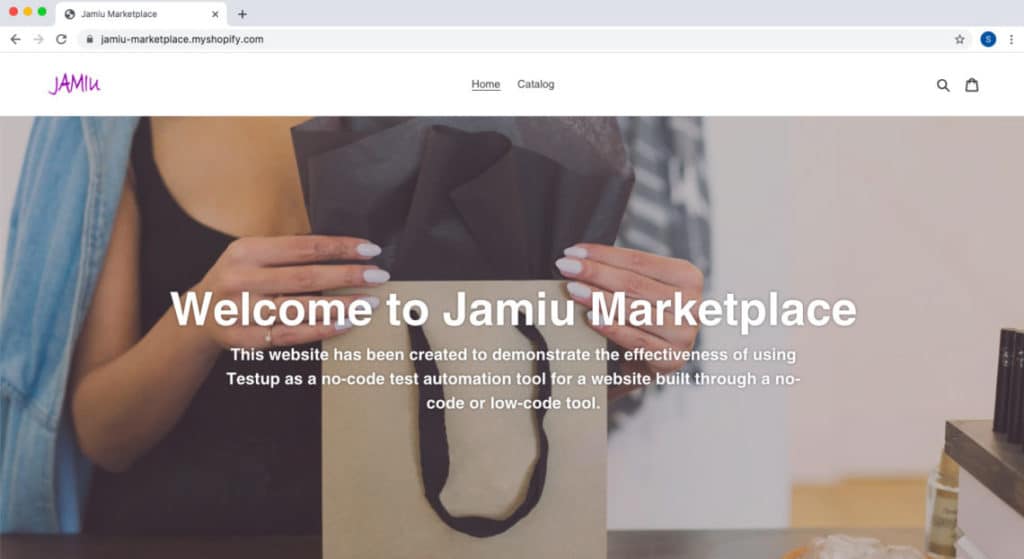
The Company X-Info had already created a great set of test cases for their Web Application when we introduced Testup. We found out many similarities of test steps that were solved with Selenium but could be done easier with Testup. The change to use Testup was quickly accepted by the developers since we could convince the whole team that Testup does the work like Selenium but with much less effort and much easier.

Structuring the test with projects and tests

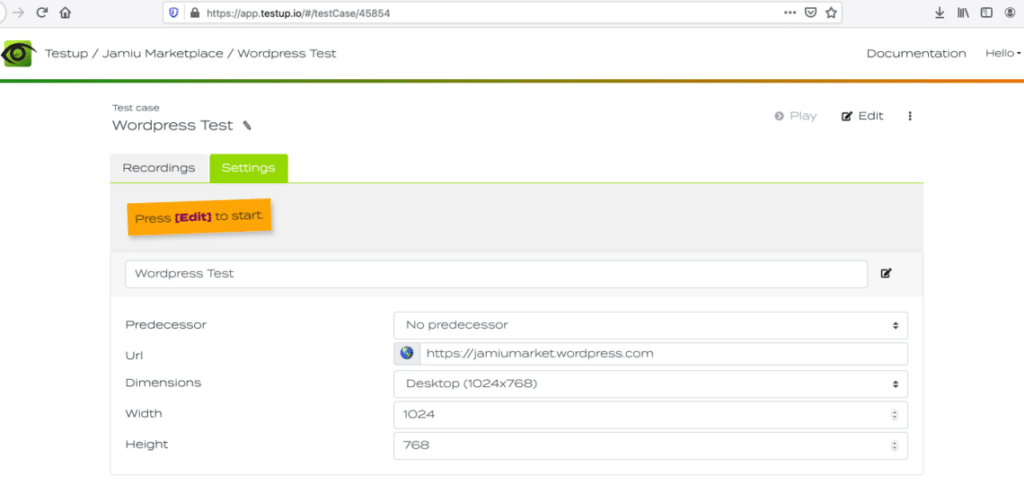
The testers had no problem to structure their tests. There were separate project created for every application. For each project a set of tests was defined. Test cases of a project define a test suite to cover all features of one application. We used predecessor test cases to set separate configuration for different devices. We also used predecessor test cases to set the configuration for different user test data used at different locations of system under test (Germany, Austria, UK). With that structure the testers could easily keep everything in place and tidy. With Testup test cases can be organized in test suites much better than with Selenium.

Use same Actions but much Easier

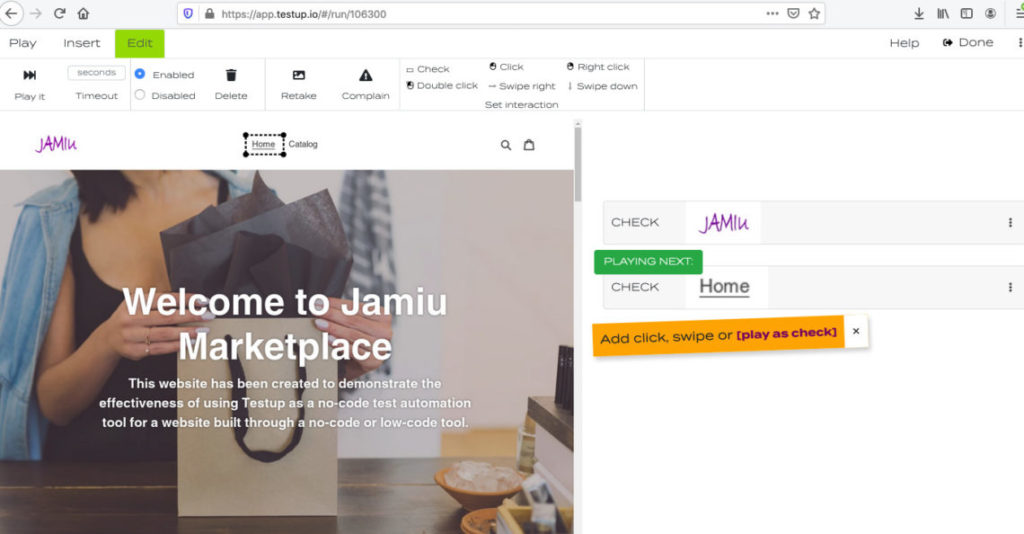
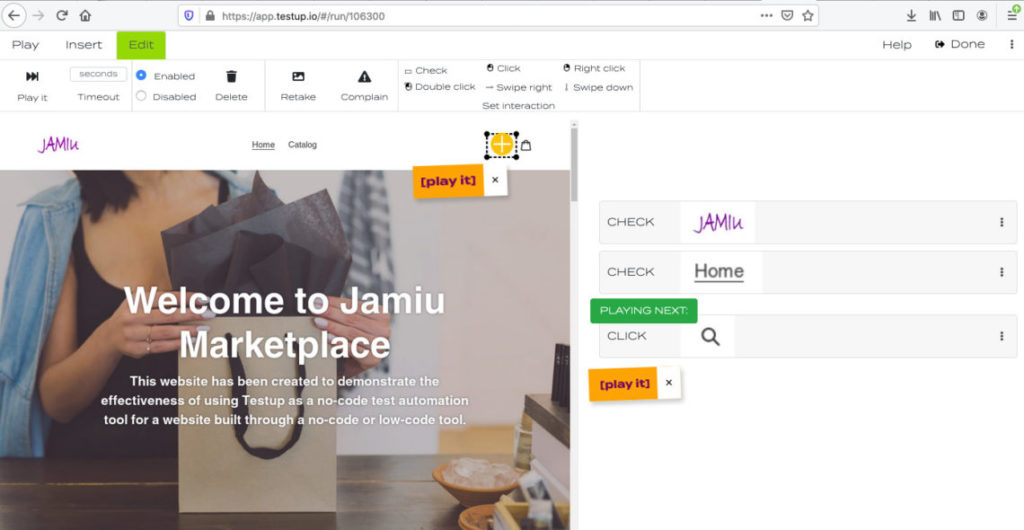
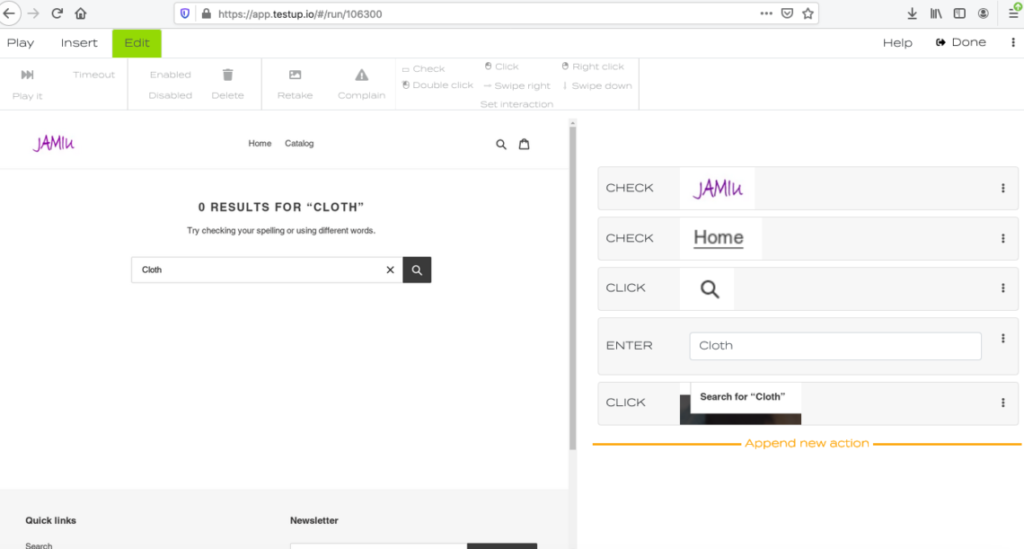
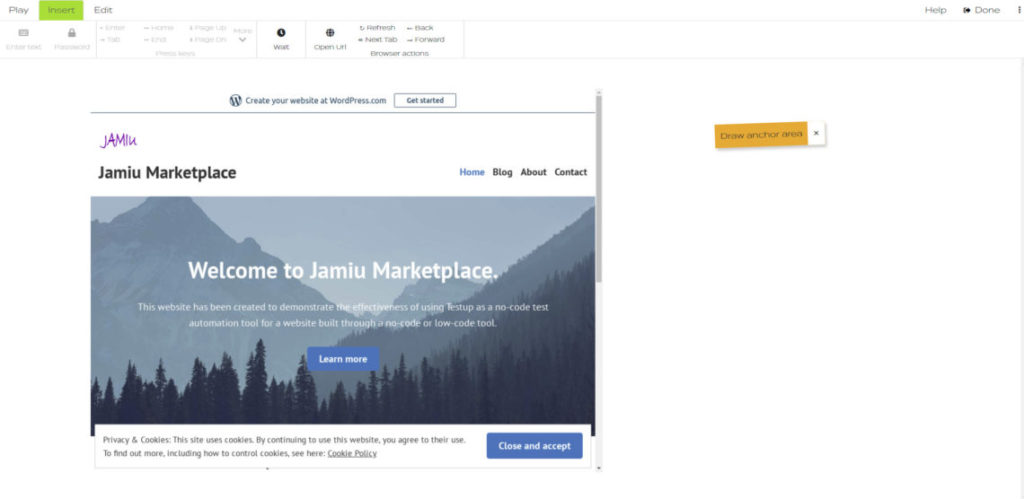
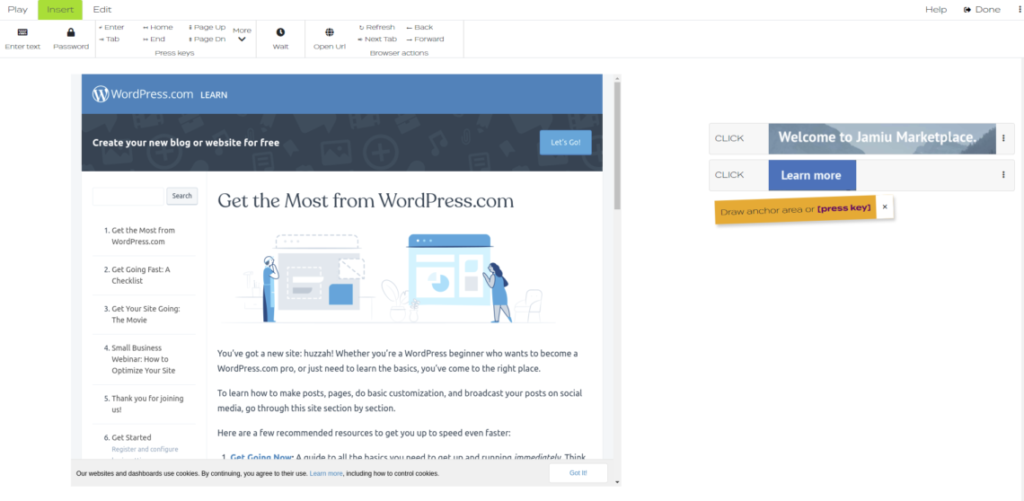
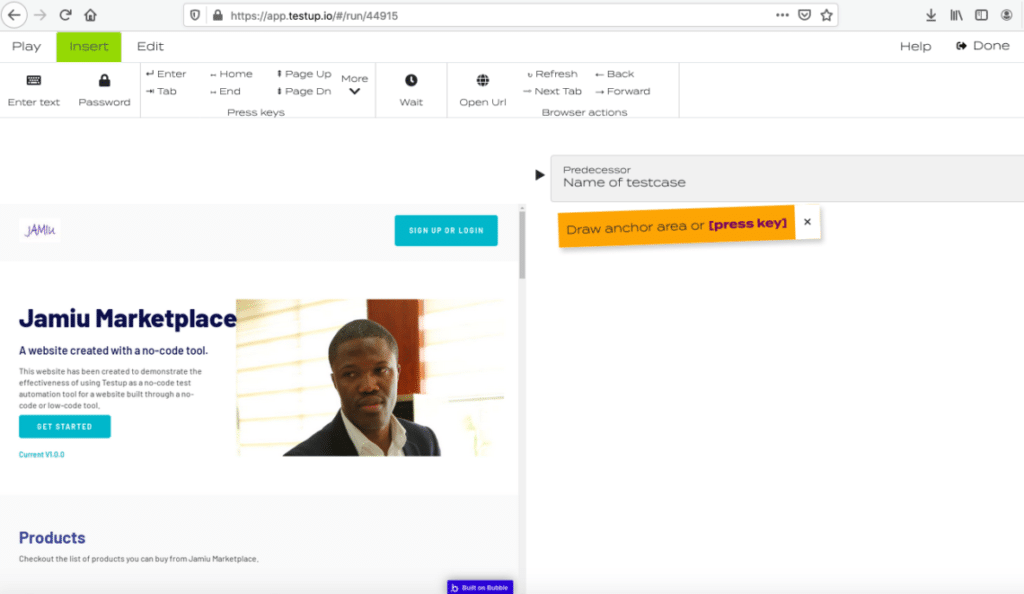
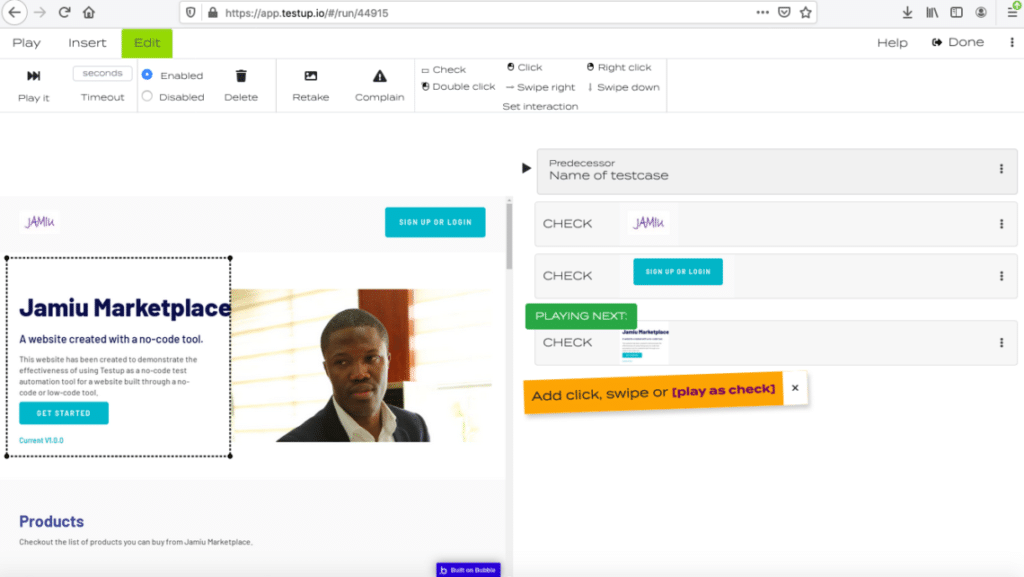
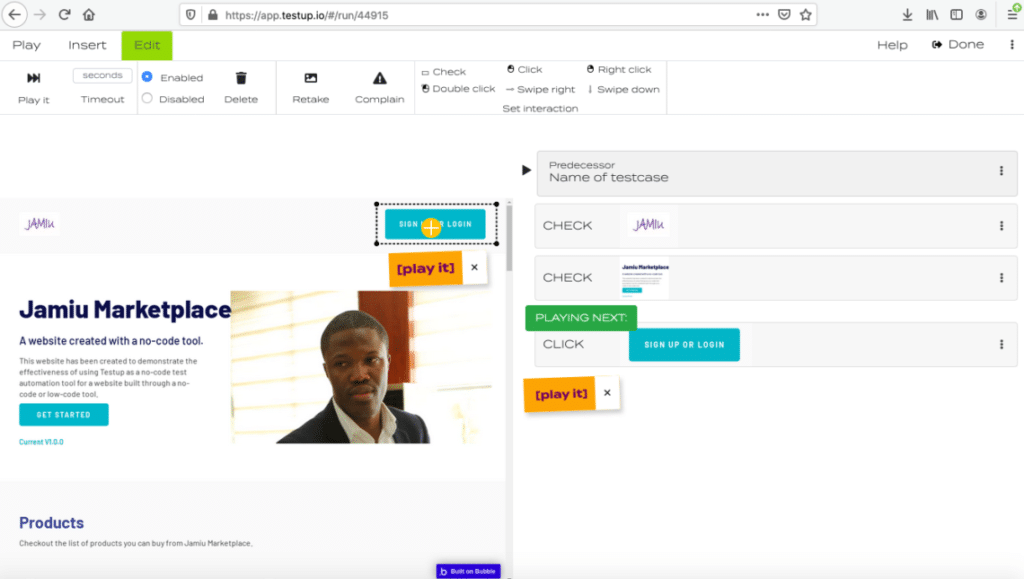
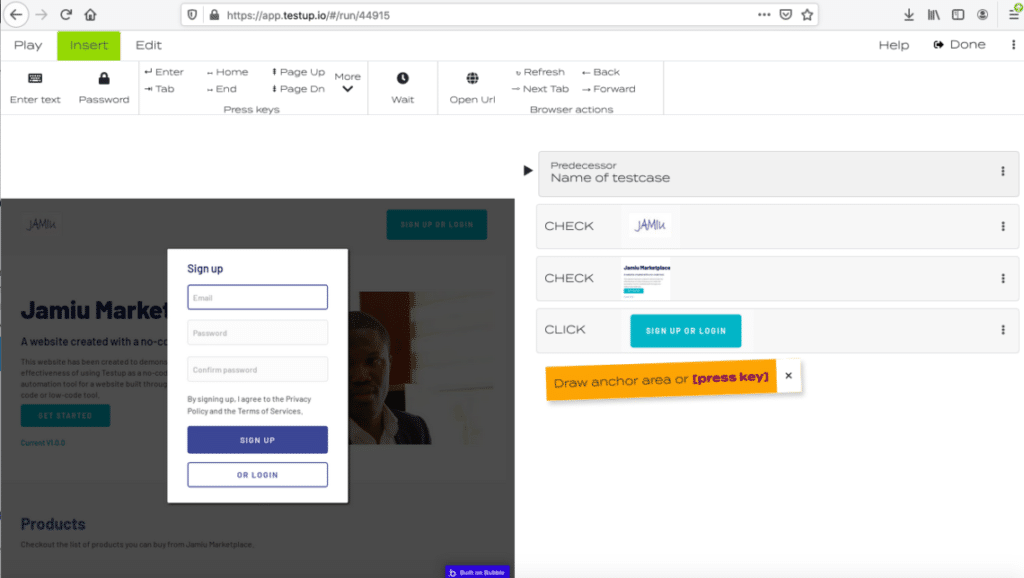
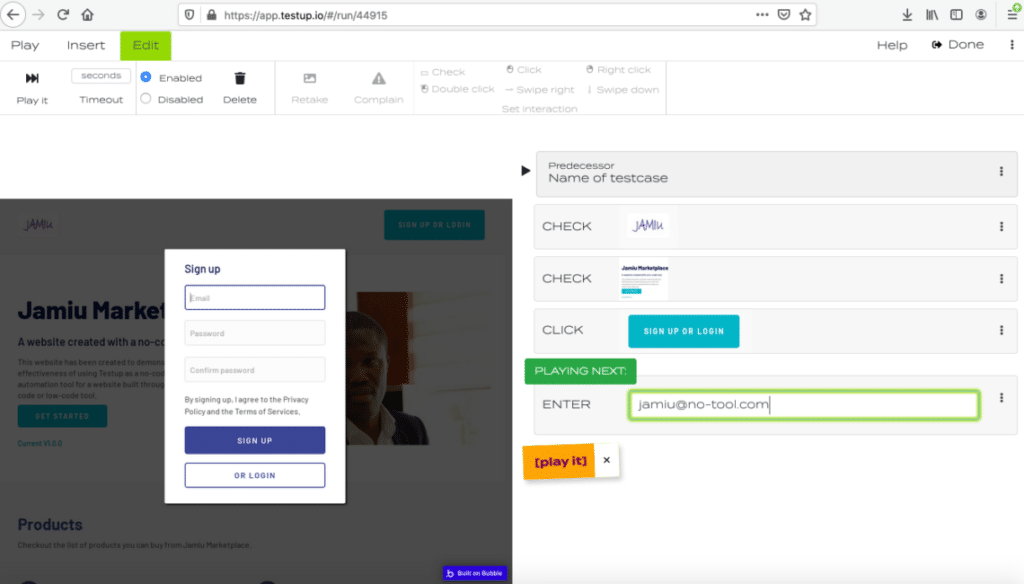
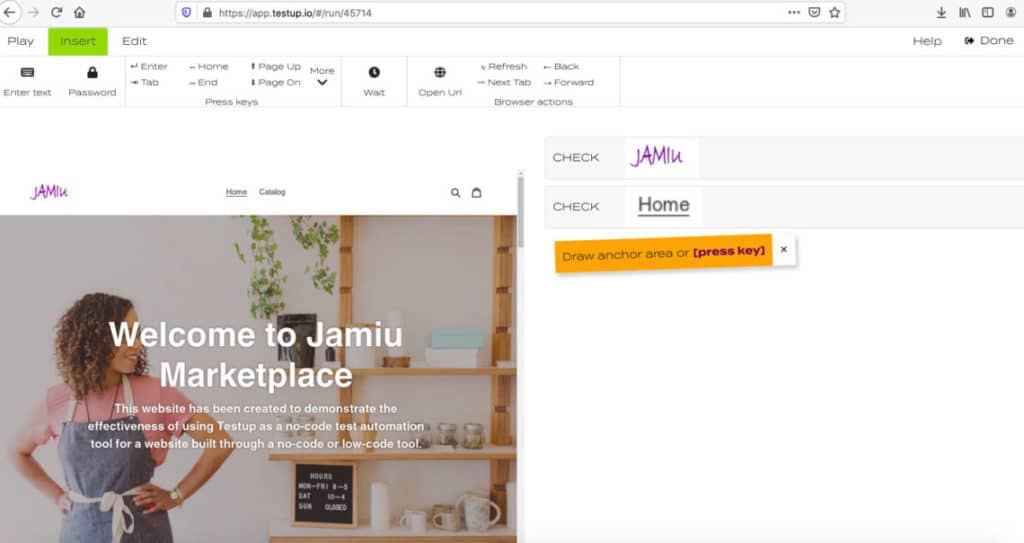
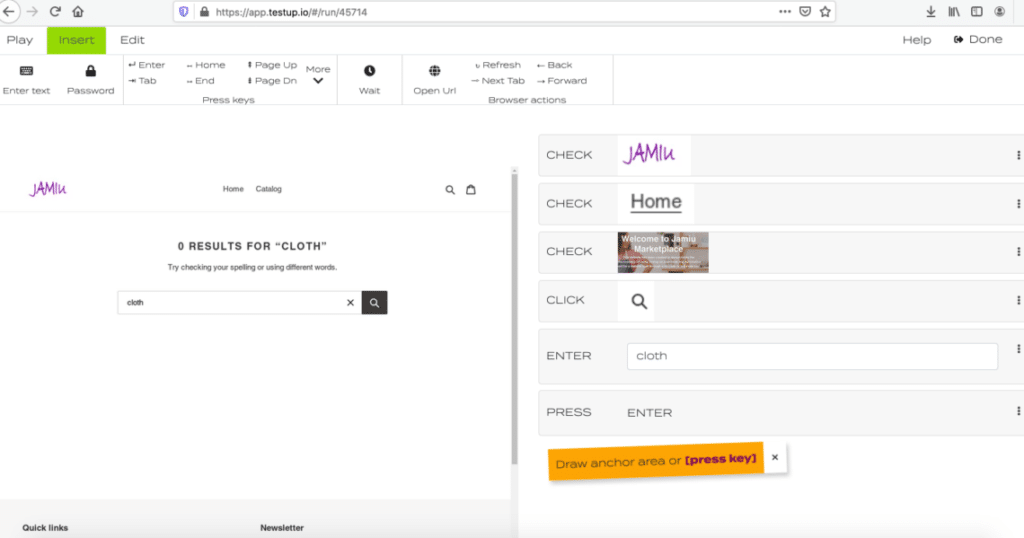
The testers started with Testup without hassle. We began the tests by drawing rectangles around objects which are called “anchor areas” in testup that were visible on the web pages. With the first “anchor areas” we checked if the logo on the web page exist. Then we checked for the existing text boxes, input fields and buttons. We just hat to draw rectangles which took us just a view minutes to finish. These selections could easily be made with the mouse. Neither xPaths nor unique Id identification were needed to access the objects on the page. These checks using an anchor area can be compared to assertions scripted in Selenium but without coding. With the summary of checks for all buttons, text boxes, pictures and input fields we defined our object repository without writing a line of code.

This is Testup’s big advantage. Selecting the anchor areas with the mouse is much easier. Further more the user can retake image very easy if an object has been changed consciously.

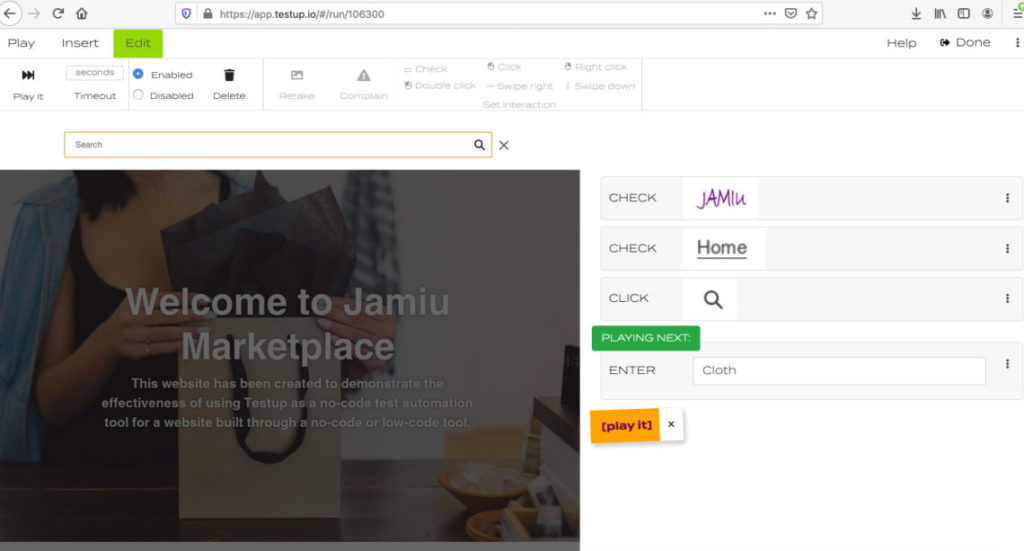
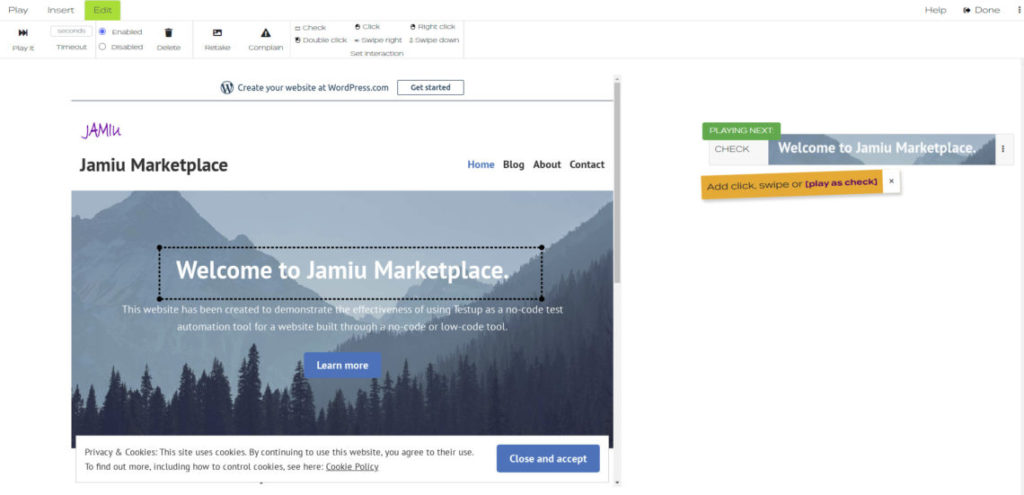
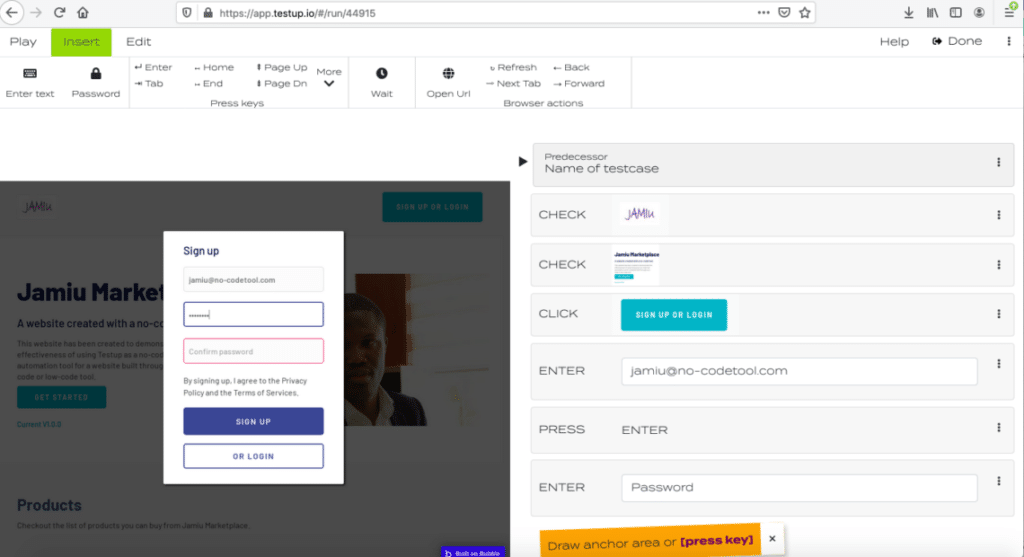
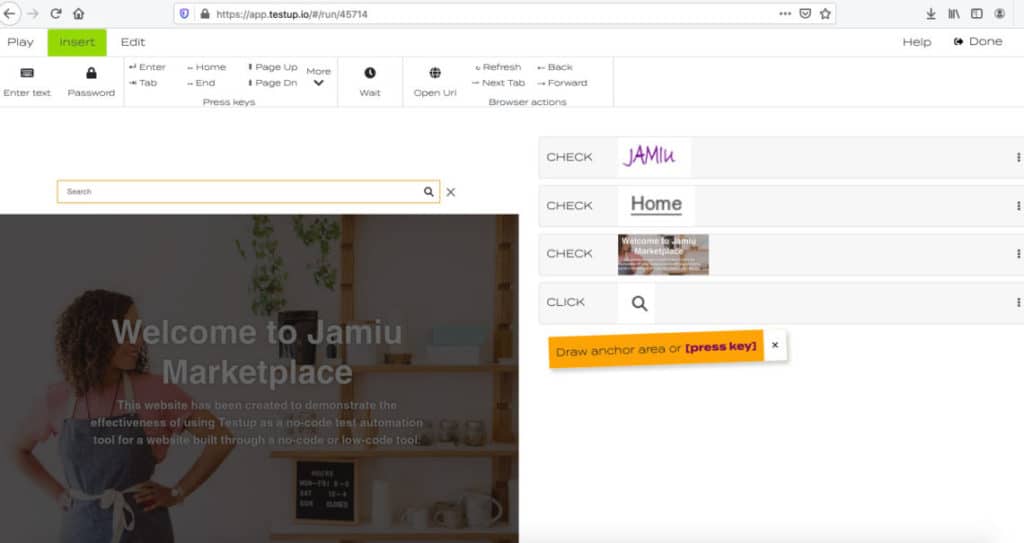
The testers found out that anchor areas of Input fields combined with typing keys on the keyboard is very similar to the Selenium function of “send keys” as a keyboard input. Also a click in selenium is a combination of an anchor area with a click inside in Testup.

This is the Testup editor view with the browserwindow on the left and the action list on the right.

Predecessors for Repetitive Tasks

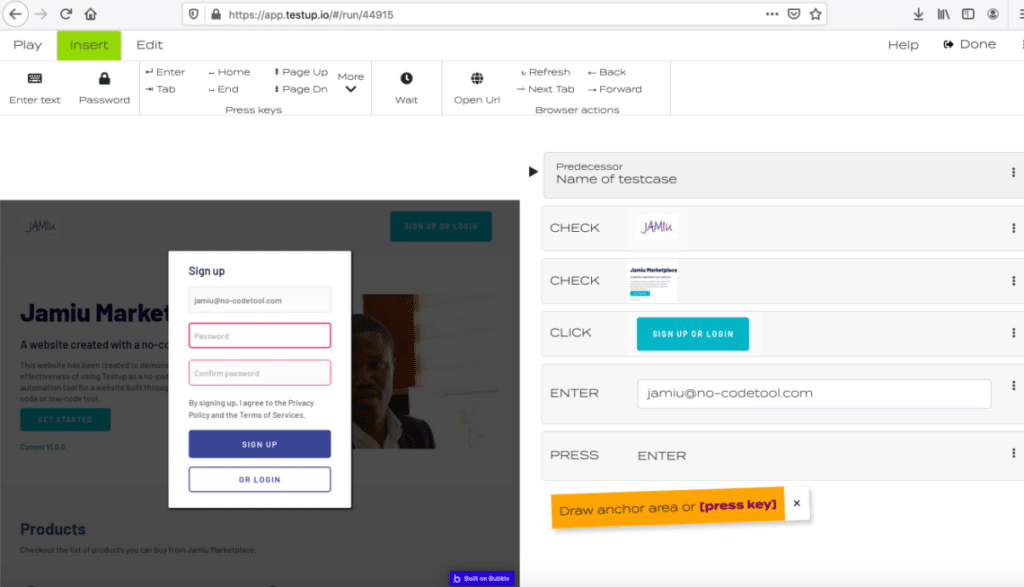
After the first test we used the test case “login” as a predecessor for all other test cases. So it is always a good practice to separate the login process from other test cases. Using test cases as a predecessor to other test cases helps to set test case preconditions. Setting identical preconditions is the key for robust repetitive automation which can be done in Testup much easier than with Selenium.

Debugging

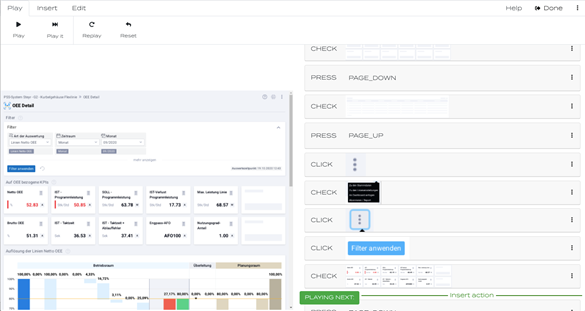
After the test cases were executed manually the next step was to run the test suite automatically in the background without user interaction. To reach this level of maturity we first wanted to debug the tests before adding them to our test suite of regression tests.

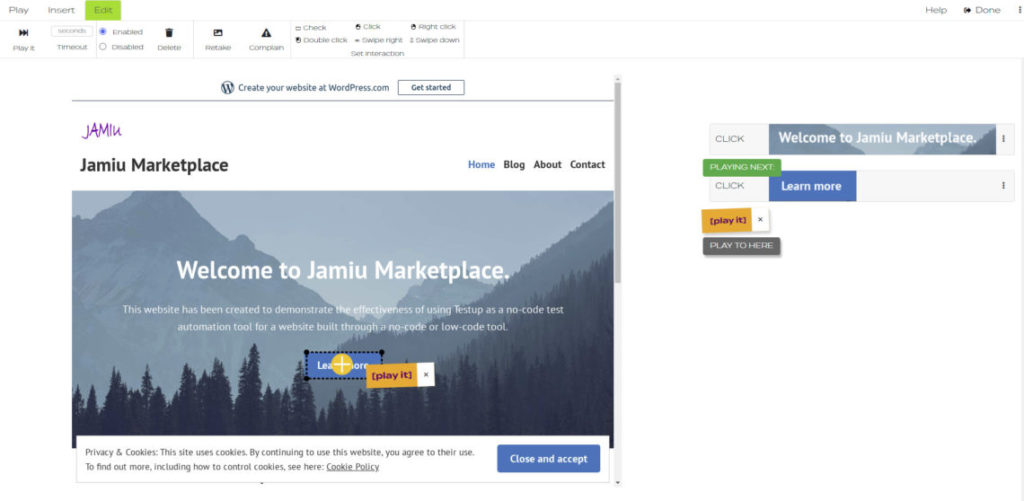
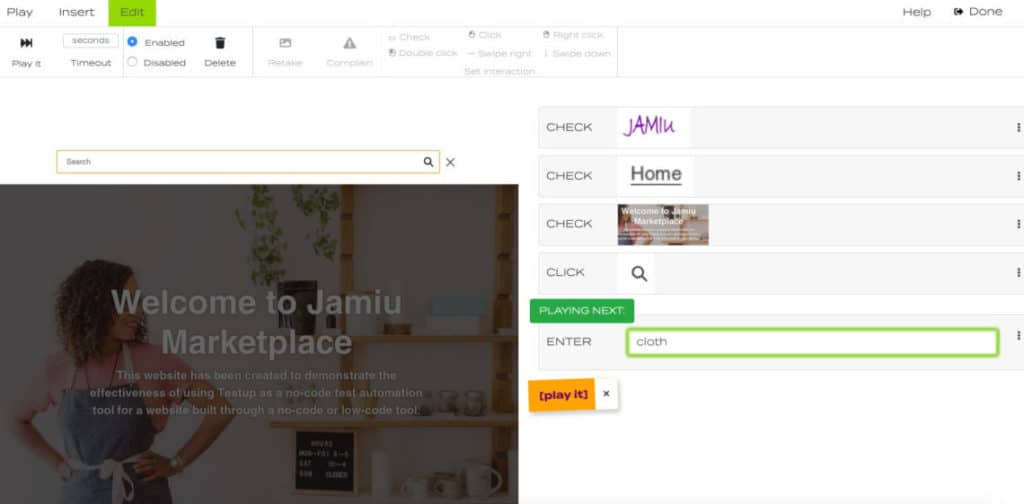
For debugging we mainly used three features in the editor of Testup: „play next“, „play to here“ and „enable/disable“ test cases. Using these features was very comfortable compared to the debugging of a selenium script. This features could easily be selected for the list of actions in the editor. The features „Play to here“ in Testup is like setting a breakpoint with an immediate execution in Selenium. „Enable/disable“ in Testup is like commenting out lines of code of a test case step.

Run tests

After we debugged the tests we could play all test cases from the test case overview. This is similar to starting selenium test cases in the background at the command line in the console. To take care of the application response time we had to add some wait states to the tests to avoid some server time outs during some complex calculation.

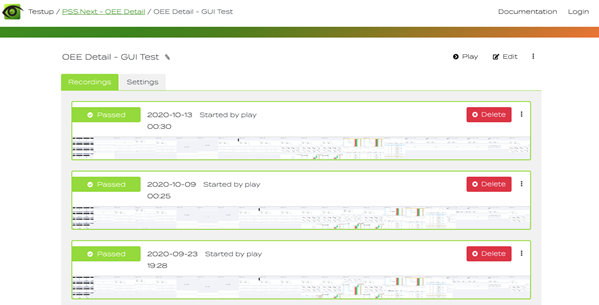
Finally, the test ran through and we could set the recording as a base line for the current release. It is possible in Testup to set more than one base line. During the time we marked the history of final recordings of each major software release as base line.

Here the test run are shown with the indication if it passed or failed.

Conclusion

All the testers found that Testup definitely is an easier way to create and maintain automated test cases. The recordings summary are frequently printed out on PDF by X-Info and sent to their customer for visual inspection. New feature could be proofed as working before software roll out.

A big thanks goes to Andreas Pfeiffer from XInfo for working together and giving valuable feedback for the usability. We use customer feedback very accurate to improve our Testup platform continuously and for our development roadmap for new features.

To summarize the benefits of Testup, it is an easy to use, visual test automation tool that is close to human behavior using the software. No coding in required to record the test cases and a visual software quality report is provided to the stakeholders.

Posted on Leave a comment

No Code Automated Testing for Shopify (Case Study)

Introduction

It’s no longer news that coding skills are becoming less of a barrier to building, launching, and testing a great website or application. Today, no code tools offer businesses the opportunity to achieve sustainable digital transformation. As succinctly put by Forbes, no-code or low-code solutions help in building powerful applications that can help any organization scale, without the need to write any code.

One of the no-code tools shaping the e-commerce world is Shopify. If small businesses can build an online presence by creating a website through Shopify, it also makes a lot of sense for them to have an opportunity to test their websites through a no-code test tool. Testup has now addressed this concern. Therefore, this article will give you a practical guide that you can follow to test your Shopify website. Grab a cup of coffee and enjoy!

Testing a Website Built with Shopify

The first step is to have a website created using Shopify. We have developed that already, and it is named Jamiu Marketplace. The website is shown in Figure 1 below.

Figure 1

Now, let’ get started with testing the website.

Sign up and log in to your Testup account. Click on Go to App, which is displayed at the top right-hand corner of the page. Then, click Create Project; afterwards, click Create Test. Complete the necessary details requested under the Settings tab. These include the website’s URL and name of the test case. After this, click Edit to begin the testing. The testing page appears as follows; with the Jamiu Marketplace on the left-hand side and while a list of checks and inputs are on the right-hand side.

To check if the website is correctly loaded and to allow us to move on to the next action, we will select an anchor area and click play as check. As seen in figure 2, the Testup AI finds every area recorded; therefore, the page is good.

Figure 2

Now, let’s see if the search button is working. To do this, we first need to check that the search input field is visible. Therefore, we select an anchor area for the search button. Then, we schedule a click and play the action. The search field appears. The result is shown in Figures 3 and 4.

Figure 3
Figure 4

Afterwards, we schedule a text input for the search field by typing a search term, say cloth and pressing the play button.

The suggestion “Search for ‘Cloth'” appears. WE can select it as an anchor area and click on it. After playing the action the search results for “cloth” appear on the browser page as shown in Figure 5.

This indicates that the search feature on Shopify’s Jamiu Marketplace is working.

Figure 5

Conclusion

Codeless test automation is an opportunity that businesses and organizations need to seize and utilize well as it is already shaping the test automation landscape. Fortunately, tools like Testup offers an affordable option without compromising the quality of the test. Getting started is easy, and you can start with a free trial; just make a single click.

Posted on Leave a comment

No Code Automated Testing for Bubble.io (Case Study)

Introduction

Long before now, test automation tools and frameworks have made testers to spend a significant amount of time on programming. As a matter of fact, most testing automation tools were developed with programming in mind. Unfortunately, testers are not programmers, and it is incredibly time-consuming to make testers go through the rigour of programming to test websites and applications. This led to the question; why not take coding away from testing? In a bid to answering that question, Testup has provided an excellent avenue for testers to enjoy a no-code test automation tool. With Testup, testers can test their websites and applications very fast and without the need to master programming.

Therefore, in this article, we will look at how you can leverage Testup to test websites built with Bubble. As you may already know, Bubble itself is a no-code tool for building sites. Many businesses and organizations are already using Bubble. It will be an excellent opportunity for such businesses to know that they can also test their no-code websites using a no-code test automation tool (Testup).

Testing Website built with Bubble

First, we have developed a website named Jamiu Marketplace using the Bubble no-code tool. The process of building the website is shown in Figure 1, while the completed website is shown in Figure 2.

Figure 1
Figure 2

Testing Bubble’s Jamiu Marketplace

The first step is to register on Testup. Then, log in and click on Go to App which can be seen at the top right-hand corner of the page. After that, click on Create Project, then, click Create Test.

Fill in the necessary details like URL and name of the test case under the Settings tab. Once you have done that, click Edit to start testing.

The testing page will appear as follows (figure 3); with the Jamiu Marketplace on the left-hand side and while a list of checks and inputs are on the right-hand side.

Figure 3

To check if the website is correctly loaded and to allow us to move on to the next action, we will select an anchor area and click play as check. As seen in figure 4, the Testup AI finds every area recorded; therefore, the page is good.

Figure 4

Testing Clickable Buttons

Let’s check if a SIGN UP OR LOG IN clickable button is working. First, we select an anchor area covering the button. After that, click on the selected area; a circle icon with a plus sign will appear on it as shown in figure 5.

Figure 5

Clicking on the play it button will search the circle icon and click it. The result is shown in figure 6, which shows that the SIGN UP OR LOG IN command on Bubble’s Jamiu Marketplace is working.

Figure 6

Now, let’s take the testing a step further by trying to sign up. This means we want to input our email and password.

The text input field is already active. So we can schedule a text input for the email field just by typing the email address and pressing the play button afterwards. The email will appear in the input field. To move to the next text input field we can press enter or tab on the keyboard. The process is shown in figures 7 and 8.

Figure 7
Figure 8

Guess what? We can also test if the password field is working by repeating the same procedures, we followed for the email address. This is shown in figures 9 and 10.

Figure 9
Figure 10

Now, we will select the SIGN UP button as an anchor area; schedule a click and play it. Once we do this, the following page appears (figure 11). Notice that there is a LOG OUT button at the top right corner of the browser page; it means that the account has been created. Perfect! The SIGN UP feature on Bubble’s Jamiu Marketplace is working.

Figure 11

Conclusion

Testup has made it clear that with codeless automation, there is no need for you to understand coding to automate tests on the go and without a waste of time. In essence, we can say that codeless test automation is now within reach. By leveraging Testup, you can test any website or application. Get started here.

Posted on Leave a comment

How to Open a New Tab using Selenium WebDriver

One of the actions that seem a bit hard in automation is opening a new tab with the Selenium WebDriver. However, this should not be hard for you. This article will provide everything you need to know to open new tabs in with the Selenium WebDriver with ease.

What You Should Know

While running a Selenium test, it is possible to have multiple tabs if required just as possible as it is to open new tabs on your web browser. While many pages open new tabs automatically in a single browser window, you will need to know how to in pages that don’t. An example of a page that will open a link in another tab features the target=”_blank”. You will learn how to open multi-tabs using the Selenium WebDriver during testing.

During multi-tabs testing, some of the actions you will need to take include launching your browser, maximizing your browser, creating multi-tabs, switching tabs, executing actions on respective tabs before eventually exiting the browser.

To open a new tab using Selenium WebDriver if it does not open automatically:

  • Use the driver.findElement(By.cssSelector(“body”))
  • Then sendKeys(Keys.CONTROL+”t”)
  • Send Ctrl + t to launch a new tab as you usually do in your browser.

Another alternative method to also open a new tab using Selenium WebDriver is to follow these codes:

driver = new ChromeDriver();
driver.manage().window().maximize();
driver.get("https://www.google.com/");
String a = "window.open(link,'_blank');"; // replace link with your desired link
((JavascriptExecutor)driver).executeScript(a);

After your new tabs have been successfully created, you will also need to know how to switch or navigate between the numerous tabs you might open. To do this, you can use the driver.switchTo(). Window (<some window>) gives you the freedom to transfer control from your current tab to another while also performing different actions in the tabs.

Moving Forward

By following the steps outlined above, you can easily launch Selenium WebDriver successfully without any hassle. If you face any other issue, you can get in touch with us at Testup; we are willing to h

Posted on Leave a comment

No Code Automated Testing for WordPress (Case Study)

Introduction

Just like any other craft, coding takes months or even years to master. Therefore, it is challenging to make businesses and testers go through a bunch of codes and fix lots of errors in applications. Codeless automation testing tools is the perfect solution to this challenge. In a nutshell, codeless test automation involves making automated tests without the need to write or understand a single line of code. With this, anyone even with no programming skills will be able to test websites and applications seamlessly.

WordPress is a very common codeless tool for building websites. With WordPress, many businesses have built functional websites that have helped in boosting revenue. Won’t it be an excellent opportunity to have a codeless test automation tool to test a website built by a codeless tool like WordPress? Your answer is as correct as ours; it’s a defining moment in the technological world as we now have several codeless test automation tools for this purpose. One of the most amazing among these no code tools is Testup.

Testup is simple to use and user-friendly. It also allows you to maximize test reliability. Read on to see a practical process of how you can use Testup for a website built with WordPress.

Testing a WordPress Website with Testup

To do this testing, we need a website built with WordPress. Therefore, we have developed a website called Jamiu Marketplace using the WordPress no code tool. The website is shown in figure 1 below.

Figure 1

It’s time to test the website using the Testup no code automation tool. First, register on Testup and log in; afterwards, click on Go to App at the top right-hand corner. Then, click on Create Project and subsequently, Create Test.

Under settings, you will be required to fill in details like the URL and name of the test. For our WordPress website, the details have been filled, as shown in Figure 2 below. Let’s name the test ‘WordPress Test’.

Figure 2

After filling the details, the next thing is to click Edit to start testing.

Testing Jamiu’s Marketplace

After clicking Edit, the testing page will appear, as shown in Figure 3. Here, you will see the browser window of Jamiu Marketplace on the left-hand side of the editor. On the right-hand side, you will see a list of checks and inputs.

Figure 3

To check if the website is correctly loaded and to allow us to move on to the next action, we will select an anchor area. Anchor areas can be quickly recorded by selecting a desired area with the mouse. This is shown in figure 4.

Figure 4

Click the play as check button to carry out the check. Afterwards, you can move on the next check. If the Testup AI finds every area you record, then the page is good.

Testing Clickable Buttons

You can also use Testup to test if a clickable button is working. First is to ensure that the particular button is visible on the website. To do this, select an anchor area that covers the button. After that, click on the selected area; a circle icon with a plus sign will appear on it as shown in figure 5.

Figure 5

Clicking on the play it button will search the circle icon and click it. The result is shown in figure 6, which shows that the Learn more command on Jamiu Marketplace is working.

Figure 6

Conclusion

No code test automation is growing at an exponential rate. Having read this article, you will realise that Testup gives every tester a significant relief from the burden of mastering complex testing codes or frameworks. Visit Testup today to get started without any delay.

Posted on Leave a comment

No/Low Code Test Automation for Apps Built with No-Code or Low Code Tools

Introduction

The last few years in software development have proven one thing; that the no-code revolution is here. Developers and software development companies have realized that the no-code or low code approach offers an efficient way to meet the surging demand for more software worldwide. By freeing up the time that would have been spent on writing complex codes, enterprises can now focus on strategic and high-level work to create more business value, promote collaboration and innovation. As a matter of fact, many tech startups have launched across the world without the need to write a single line of code; that’s the power of the no-code approach to software development. It is no longer about the future; it’s now with us here in the present. From building websites to developing apps and launching workflow automation, everything can now be done faster, more than ever before.

Amazing, isn’t it? However, if we can now build complex apps without multiple developers, huge cost, or extended duration, how about testing these websites and applications? The purpose of making software development less time consuming and much more comfortable will be defeated if it takes more time and cost to test and maintain the same software. Guess what? The same no-code or low code approach used for software development is now being used to transform testing. The result of this effort is no-code or low code test automation.

No-Code for No-Code

Wouldn’t it be a great disruption in the tech industry to leverage a no-code or low code test automation tool to test an app or website built with the same low or no-code approach? This is a great time; huge costs will be minimized, time will be reduced drastically, complexities will become simple, business processes will become more seamless. Ultimately, there will be massive growth for enterprises that utilize this massive opportunity as they will become more competitive. To show you how easy this is, let’s use Testup, a seamless no-code test automation tool to test websites built by no-code tools like WordPress, Bubble, and Shopify. To do this, we will build a website named Jamiu Marketplace, with the three no-code tools making three websites in all. Each of these websites will be tested using Testup. This will be practical; relax and enjoy the flow.

Testup for WordPress

First, we have developed a website for Jamiu Marketplace using the WordPress no-code tool. The website is shown in figure 1 below.

Figure 1

It’s time to test the website using the Testup No-code automation tool. Before we get started, it’s good to note that you do not need any coding skills to get started with this testing. Register on Testup and log in; afterwards, click on Go to App at the top right-hand corner. Then, click on Create Project and subsequently, Create Test.

Under settings, you will be required to fill in details like the URL and name of the test. For our WordPress website, the details have been filled, as shown in Figure 2 below. Let’s name the test ‘WordPress Test’.

Figure 2

After filling the details, the next thing is to click Edit to start testing.

Testing WordPress’ Jamiu Marketplace

After clicking Edit, the testing page will appear, as shown in Figure 3. Here, you will see the browser window of Jamiu Marketplace on the left-hand side of the editor. On the right-hand side, you will see a list of checks and inputs.

Figure 3

To check if the website is correctly loaded and to allow us to move on to the next action, we will select an anchor area. Anchor areas can be quickly recorded by selecting a desired area with the mouse. This is shown in figure 4.

Figure 4

Click the play as check button to carry out the check. Afterwards, you can move on the next check. If the Testup AI finds every area you record, then the page is good.

Testing Clickable Buttons

You can also use Testup to test if a clickable button is working. First is to ensure that the particular button is visible on the website. To do this, select an anchor area that covers the button. After that, click on the selected area; a circle icon with a plus sign will appear on it as shown in figure 5.

Figure 5

Clicking on the play it button will search the circle icon and click it. The result is shown in figure 6, which shows that the Learn more command on Jamiu Marketplace is working.

Figure 6

Testup for Bubble

Like we did with WordPress, the first thing here is also to develop a website for Jamiu Marketplace using the Bubble no-code tool. The process of building the website is shown in Figure 7, while the completed website is shown in Figure 8.

Figure 7
Figure 8

Testing Bubble’s Jamiu Marketplace

We repeat the same procedures followed in the last test to create a new test case. Then, the testing page appears as follows (figure 9); with the Jamiu Marketplace on the left-hand side and while a list of checks and inputs are on the right-hand side.

Figure 9

To check if the website is correctly loaded and to allow us to move on to the next action, we will select an anchor area and click play as check. As seen in figure 10, the Testup AI finds every area recorded; therefore, the page is good.

Figure 10

Testing Clickable Buttons

Let’s check if a SIGN UP OR LOG IN clickable button is working. First, we select an anchor area covering the button. After that, click on the selected area; a circle icon with a plus sign will appear on it as shown in figure 11.

Figure 11

Clicking on the play it button will search the circle icon and click it. The result is shown in figure 12, which shows that the SIGN UP OR LOG IN command on Bubble’s Jamiu Marketplace is working.

Figure 12

Now, let’s take the testing a step further by trying to sign up. This means we want to input our email and password. To enter a text in an input field, we first need to check that the input field is visible. Therefore, we select an anchor area for the email field. Then, we schedule a click and play the action.

Then, we schedule a text input for the email field by typing the email address and pressing the play button afterwards. The email will appear in the input field. The process is shown in figures 13 and 14.

Figure 13
Figure 14

Guess what? We can also test if the password field is working by repeating the same procedures, we followed for the email address. This is shown in figures 15 and 16.

Figure 15
Figure 16

Now, we will select the SIGN UP button as an anchor area; schedule a click and play it. Once we do this, the following page appears (figure 17). Notice that there is a LOG OUT button at the top right corner of the browser page; it means that the account has been created. Perfect! The SIGN UP feature on Bubble’s Jamiu Marketplace is working.

Figure 17

Testup for Shopify

Nothing different, the same way we have tested the websites created by WordPress and Bubble, we will now test the Jamiu Marketplace website created by Shopify using Testup. This is fun, let’s go!

First, we create the Jamiu Marketplace website using Shopify; the website is shown below (figure 18).

Figure 18

We log in to Testup and create a new test case for the website. Then, the testing page appears as follows; with the Jamiu Marketplace on the left-hand side and while a list of checks and inputs are on the right-hand side.

To check if the website is correctly loaded and to allow us to move on to the next action, we will select an anchor area and click play as check. As seen in figure 19, the Testup AI finds every area recorded; therefore, the page is good.

Figure 19

Now, let’s see if the search button is working. To do this, we first need to check that the search input field is visible. Therefore, we select an anchor area for the search button. Then, we schedule a click and play the action. The result is shown in Figure 20.

Figure 20

Afterwards, we schedule a text input for the search field by typing a search term, say cloth and pressing the play button (figure 21). As shown in figure 22, the search results for “cloth” appear on the browser page. This indicates that the search feature on Shopify’s Jamiu Marketplace is working.

Figure 21
Figure 22

Keeping it Real with No-code Test Automation

Using Testup as a no-code test automation tool for your website comes with no hassle. First, it does not break when you add the logic. Second, the production environment works perfectly well, even after the provider or host creates an update. Among many other things, the advantages of using Testup include the following:

  1. No prior coding knowledge is required
  2. It allows you to match the pace of the software development cycle
  3. You can extend the scope of automation
  4. You can easily document processes
  5. It enables you to free up resources while enjoying better testing and low costs.

Conclusion

Let’s face reality; learning coding is hard. It takes a great deal of time, as well. Today, you do not need to learn code before building a great IT business. Either to develop a website, web app or mobile app, no-code tools like WordPress, Bubble, and Shopify are available for you. To test your websites, Testup offers you seamless no-code test automation. What a great time to be alive; everything can be done with no or low code. Enjoy!