If you need to create the same test for your product multiple times due to minor differences of different settings (e.g. language, browser, environment, etc.), you can use Branching. This function allows to record test steps for all settings under test in just one test case.
Create a first branch
First, you need to create a branch in your predecessor test.
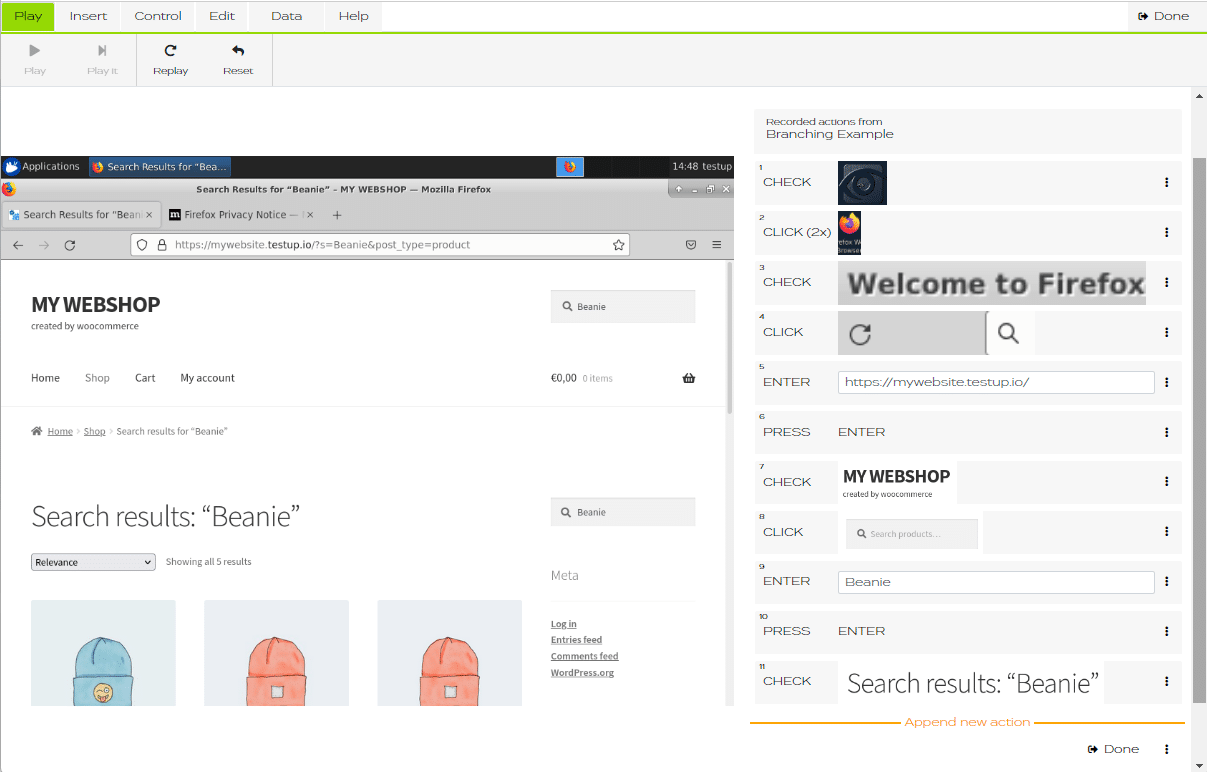
- Create a test and record actions in one of your chosen browsers (e.g. Firefox, Chrome, etc).
- In the
mode create a new variable by clicking
.
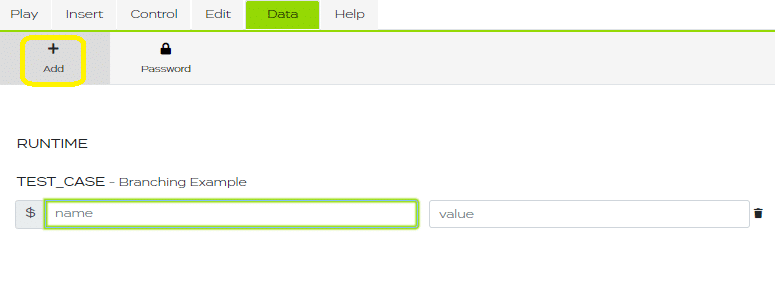
- Name your variable BRANCH using upper case and insert the value according to the current browser (e.g. Firefox).

- Click .


Create a second branch
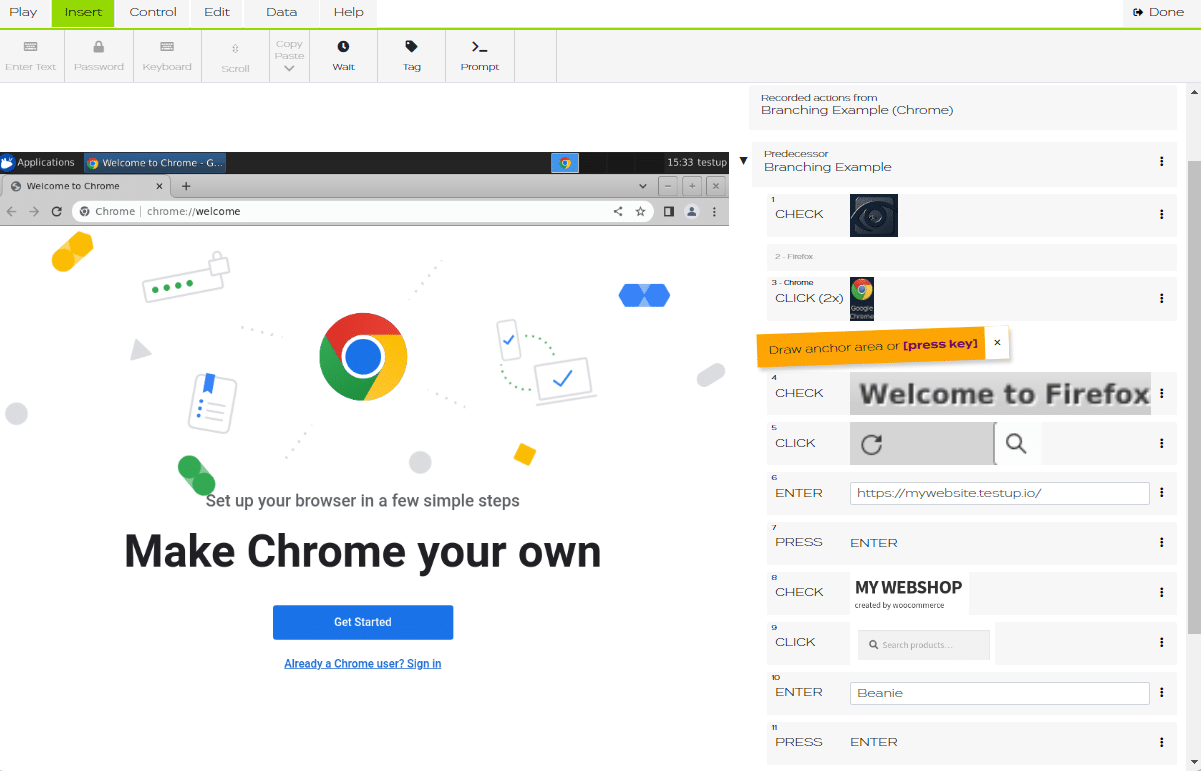
Then create a second branch in your successor test.
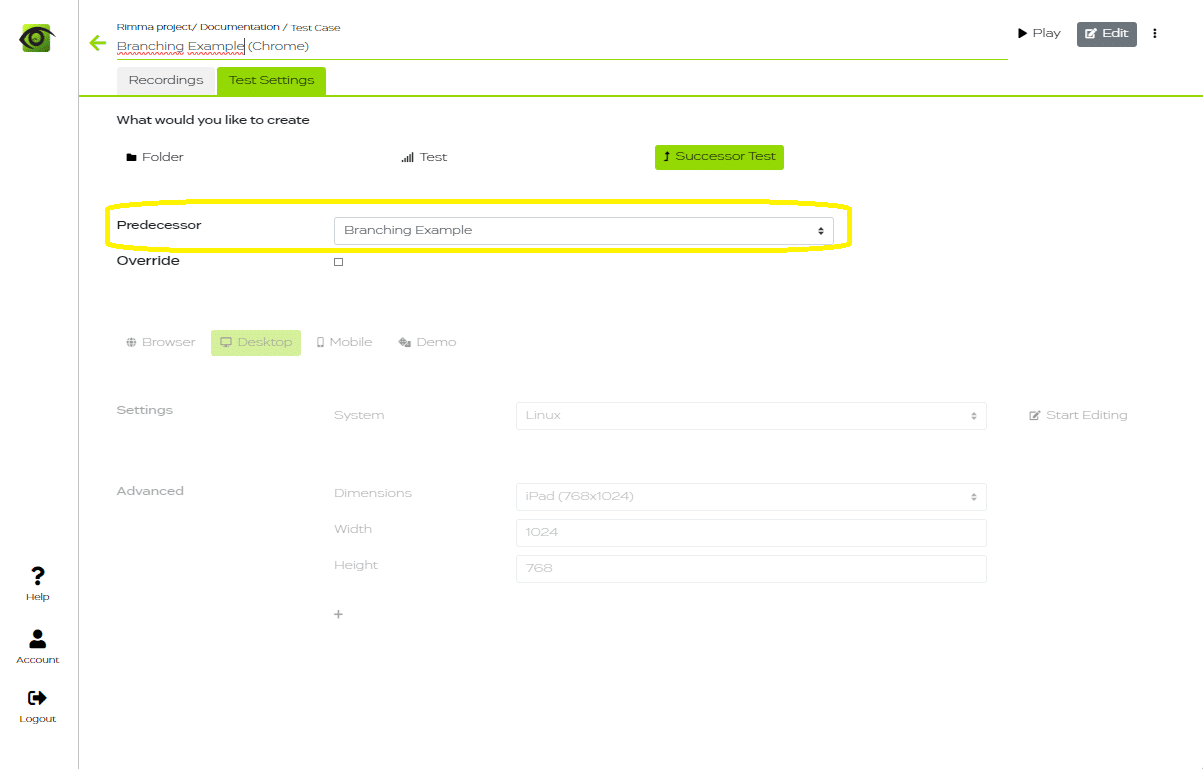
- Create a new test as a successor and choose in the test settings your previously created predecessor.
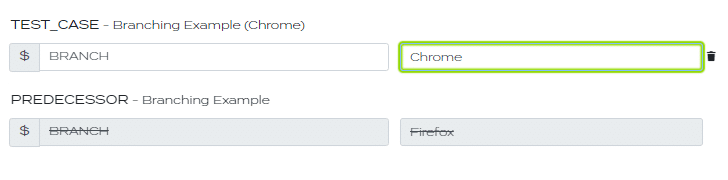
- In the
mode click on the overwrite symbol to the right of your BRANCH variable

- Play your test until the step where the branching should start.
- Go to
mode and enter your variable for the first browser in the field “branch selector” (e.g. Firefox).

- Jump to the next step using
in the
menu of the following step.
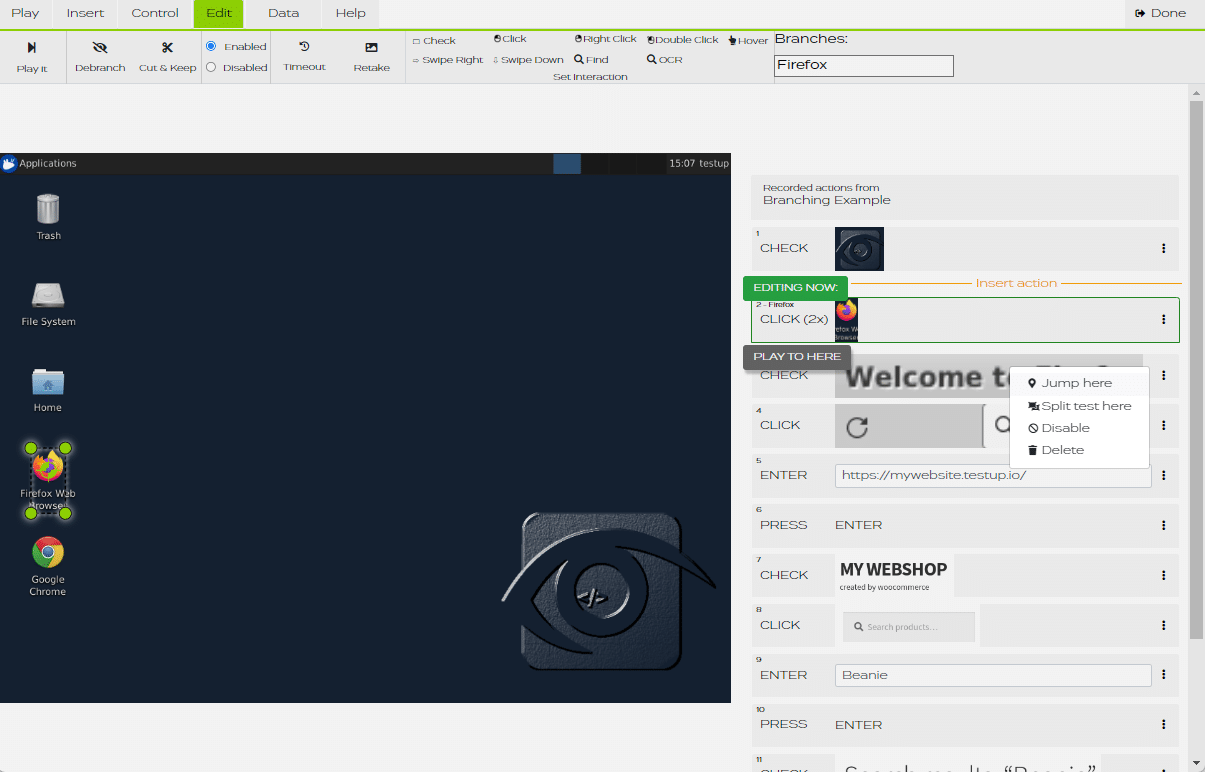
- Click on “Insert action” and record the first action of your second branch (e.g. double click on Chrome browser). The step will be automatically marked with the name of your second branch.
- If the next action of your test is different in the second setting, repeat steps 4 – 6.
- If it is the same, simply play the following steps one by one until the action is different again and repeat steps 4 – 6.


In order to run both branches in one schedule, simply create a second successor test and name it according to your first branch.
